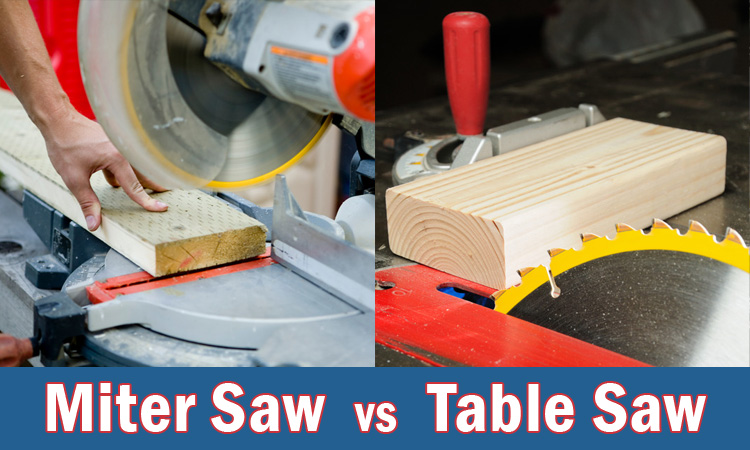
Miter Saw vs Table Saw (Common Uses and Key Differences)
There are plenty of tools out there that can do multiple tasks but tend to excel in specific areas. Those with smaller budgets can generally buy a few of these tools and have a functional workshop.
Table saws and miter saws are two great examples. Both are amazing tools that can do the same things, but there’s a reason bigger workshops have both.
Let’s look at both tools, what they do, and compare them to find which one is best suited for your personal needs.
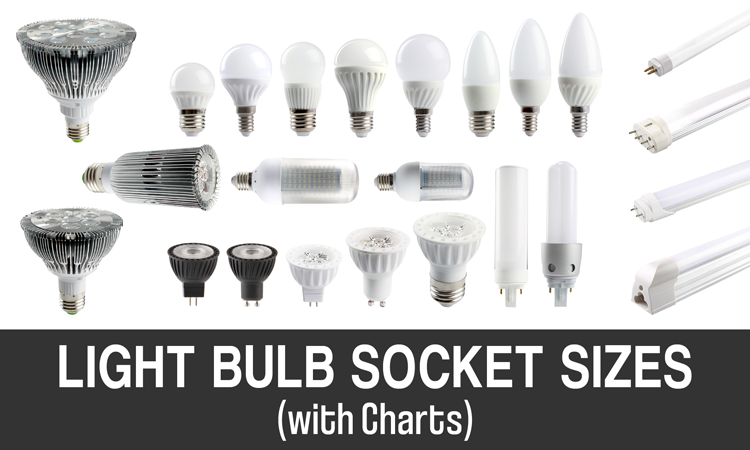
See Also: 32 Types of Saws (w/ Pictures)
What Is a Miter Saw?
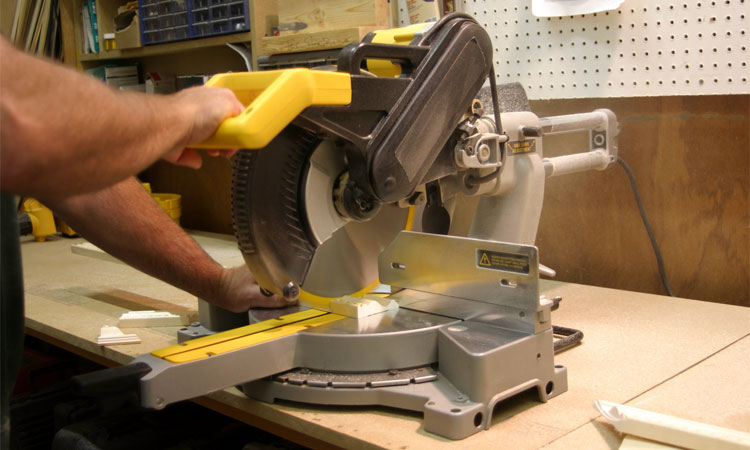
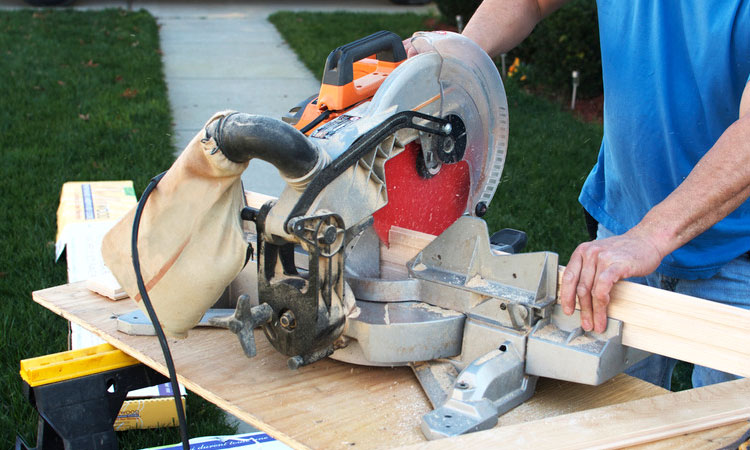
Miter saws are masters of angle cuts. Depending upon the angle of the wood, you can use these saws to cut either miters or bevels. Compound miter saws have a mechanism which allows the blade to tilt left or right. All miter saws allow the blade angle to be adjusted.
As the name implies, miter saws are designed primarily to cut miters, or 90 degree angle cuts. They’re also great at cutting bevels.
Miter saws are attached to a stand or other surface. Once you have some wood in position, you lower the blade onto it to make a cut using the arm. If your budget allows, aim for a model with a sliding arm versus a stationary arm, as the latter severely limits possible cutting depth.
When to Use a Miter Saw
- Baseboards
- Crown molding
- Picture frames
- Trim
- Crosscuts
- Angled cuts
- Bevel and compound angle cuts
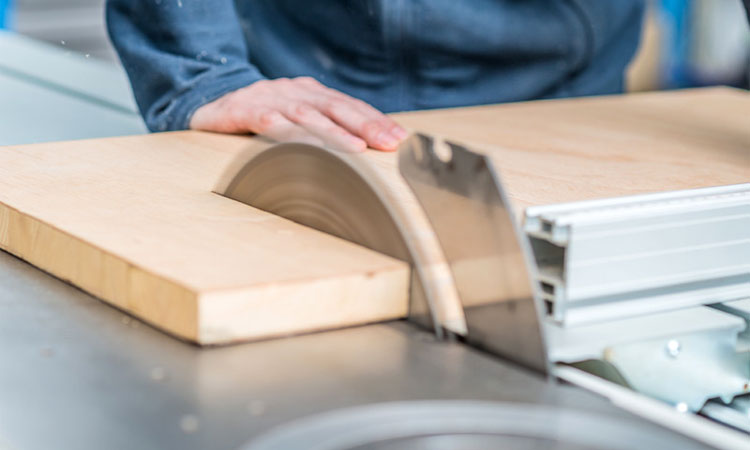
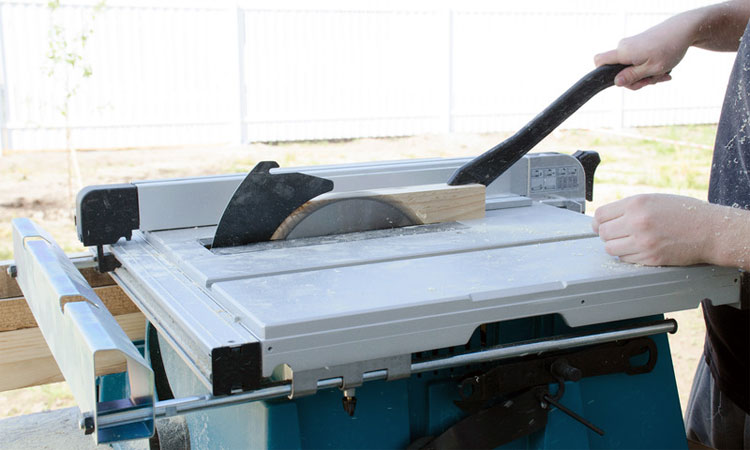
What Is a Table Saw?
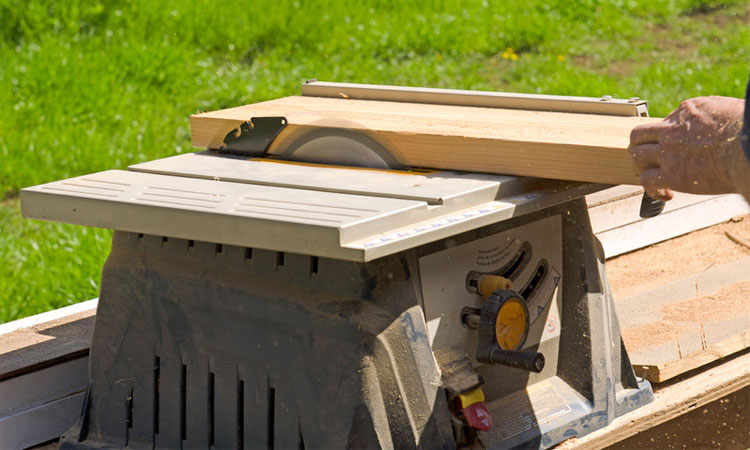
Table saws are very much what the name implies. A circular saw blade extends upwards from the middle of a sturdy table. This table helps support large boards or sheets of plywood as you guide it over the blade. A table saw will take up more space than a miter saw, but makes quick work of large projects.
Related: 9 Best Table Saw Blades
When to Use a Table Saw
- Cutting long or thick boards
- Plywood sheets
- Rip cuts
- Crosscuts
Key Differences Between a Miter Saw and Table Saw
There are a lot of important differences between these two types of saw. When choosing to purchase only one, these differences need to be taken into consideration.
Read Also: Differences Between Straight and Angled Finish Nailers
Accuracy
Both tools can be incredibly accurate, but each has its own flaws which limit that accuracy in different areas.
Table saws have a stationary blade, which means the operator must hold the material at a steady angle for an accurate angled cut. However, the table surface means it’s very easy to keep extremely large pieces steady when doing a vertical cut.
Meanwhile, the miter is exactly opposite. It lacks a good surface upon which to balance large sheets or long pieces of trim. However, its blade can be set at various angles, making it extremely accurate when cutting at specific angles.
One other accuracy problem is the shorter blade depth, which may require you to flip a teacher piece and finish the cut from the opposite side.
Miter saws do have one extra advantage in the form of a fence, which is often removable. This fence can hold smaller pieces in place, helping to remove the risk of user error. However, fences cannot be used on large pieces.
Cost
A good quality table saw is almost always going to cost more than a similar quality miter saw. But how much more is mainly determined by the type of table saw. While a good portable jobsite unit might be around $500, a stationary saw with its larger table and rip capacity will start at around $1,000 and can easily go up to $5,000 or more.
The price range of a miter saw is going to be lower overall. Expect to pay anywhere from $200 to $600 for a good compound miter saw. You can even find miter saws for under $100 but you’re likely going to be sacrificing quality and features.
If either saw doesn’t include an integrated stand or cabinet (for table saws), plan on an additional $100-$400 on top of the power tool price.
Portability
One of the biggest differences between the miter saw and table saw is portability. Table saws are excellent for the workshop, but the larger size means it can be difficult to carry it to a work site (unless you have a specific portable jobsite model). They can weigh up to 300 pounds, further decreasing their portability.
The smaller size of a miter saw and ability to mount it on a number of surfaces means it’s far easier for a contractor to fit one in his van or truck and take it wherever it’s needed. As they generally only weigh around 30 to 60 pounds, it’s easy for one person to load, unload, or carry the saw.
Saw Blade
Generally speaking, there’s little difference between the actual blades used for these two machines. However, the way they’re used is different.
Table saws have a stationary blade protruding from the table, which may be adjusted up or down for cutting depth. Meanwhile, the miter saw’s blade is suspended and brought down onto the cutting surface using a lever.
The diameter of the blade thus affects how deep the miter saw can cut.
Read Also: Can a Miter Saw Cut Metal?
Safety
Any powered saw can be dangerous, but these two saws have different risks, as well as their own safety systems.
Kickback is the single largest risk when using a table saw. As the blade rips through a piece of wood, there’s a chance it will catch and either pull the operator’s hand towards the blade or cause the wood to fly from the table, often hitting the operator.
Some common table saw safety features:
- Blade Guard – This barrier, often made of plexiglass, helps prevent the operator from coming in contact with the blade. While effective, it makes measuring and monitoring cuts more difficult, as well as adding more time and steps to blade changes.
- Magnetic Switch – This special switch automatically sets the power switch in the off position when the table saw loses power. As a result, the saw won’t automatically reactivate if power is restored.
- Push Stick – This is exactly what the name implies – a metal tool to push wood into the saw blade so your fingers stay safe.
- Riving Knife – This vertical blade is attached to the saw mechanism and helps keep the kerf open so there’s less risk of kickback. While it lacks the pawls of a splitter, its ability to move with the blade means it doesn’t have to be removed when making crosscuts.
- Sensor – This recent safety feature can detect when a human finger comes in contact with the saw blade based on conductivity. As soon as the sensor detects the finger, it activates an aluminum brake which stops the blade and drops it in only .02 seconds. This means you walk away with just a scratch, but it will destroy both the blade and brake when triggered.
- Splitter – This important feature is designed to reduce the risk of kickback. It’s a small, vertical blade behind the cutting blade which acts as a wedge to help keep the kerf from closing. Splitters often have two anti-kickback pawls which dig into the two sides of the kerf to prevent them from jumping away from the table.
Miter saws have their own common risk, which usually happens when an operator switches hands without turning the blade off first.
Additionally, the saws are aligned at the factory, but vibrations while in transport can mess up this alignment which in turn can increase the risk of injury over time. They also need to be securely bolted down onto whatever surface they’re being mounted to.
Common miter saw safety features include:
- Blade Guard – This functions more like the riving knife or splitter for a table saw than simply a protective barrier for your hands. The guard can help prevent kickback and stops debris from flying during the cutting process.
- Blade Guard Release – This disengages the blade from the work surface without interfering with the cut, reducing the risk of kickback.
- Electric Brake – The blade is stopped when contact with the material being cut is broken.
- Push Stick – As with the table saw, this tool is used to keep fingers further from the blade.
- Safety Clamps – Available in two styles for different functions, these clamps help ensure the material is secure when cutting.
Versatility
Cutting angles with a table saw is often frustrating, as you have to hold the board at the intended angle. They can cut a wide range of materials and excel at larger pieces. The ability to adjust the blade height means a good quality table saw can be used to partially or fully cut several different kinds of joint, including:
- Dado (vertical cuts)
- Half Lap
- Mitered Butt (using support to maintain angle during cuts)
- Mortise and Tenon (the tenon portion)
- Rabbit
- Tongue and Groove (tongue and vertical cuts on groove)
With some effort, you can also achieve dovetails or other angled cuts, but the accuracy will suffer.
Meanwhile, most miter saws have a stationary arm which limits the cutting depth of the blade, making it more difficult to cut thick boards. Depending on the surface you attach it to, it can also be very difficult to work with larger pieces, such as plywood sheets.
The miter can cut all of the same types of joint as the table saw, but the ability to set a blade angle means it can also be used to cut dovetail joints (with the exception of the horizontal cut on the groove). Both types of saw can work with a variety of materials, depending on the blade attached and strength of the motor.
But overall, it’s hard to beat the versatility of a compound miter saw. If you’re debating between which saw to buy first, the answer is almost always going to be a miter saw. The exception may be if you plan on mainly making longer and larger cuts.